![[Title] Axie Ruin 11-15 Strategy](https://blockchain-game.jp/wp-content/uploads/2022/01/【タイトル】AxieRuin11-15攻略English1.jpg)
[box02 title=”What you can learn from this article
“]・ Axie Infinity’s ADVENTURE Ruin 11 ~ 15 information
・ Tips for defeating the enemy[/box02]
The greatest trials comes when you have experienced the depth of Axie infinity.
That is, Ruin12.
[chat face=”TJ_confuse.png” name=”TJ” align=”left” border=”gray” bg=”none” style=”maru”]To tell the truth, I had a hard time clearing Ruin 12 …[/chat]
In this article, I will introduce all the tips for clearing Ruin 11 to 15 that I have struggled to find.
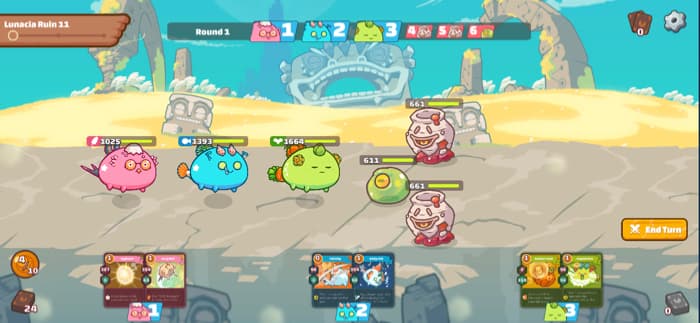
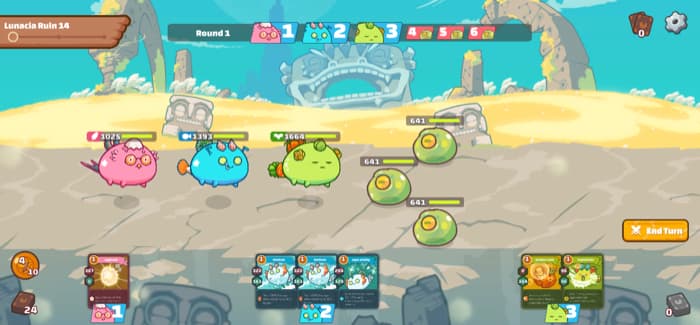
Ruin 11 (aim level 10)


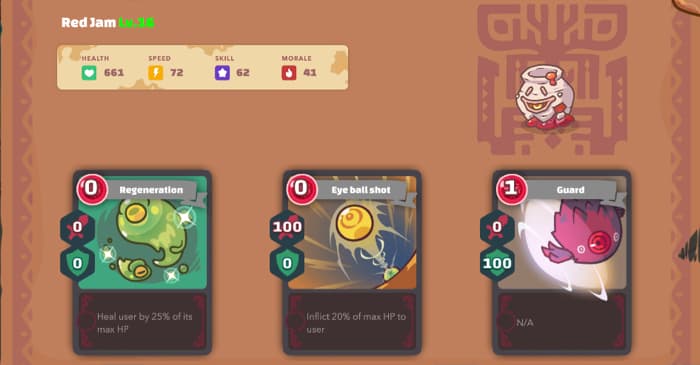
[chat face=”TJ_confuse.png” name=”TJ” align=”left” border=”gray” bg=”none” style=”maru”]Red Jam is really annoying.[/chat]
In addition to the standard skill that causes great damage, he also have lowers the attack power and stun debuff.
Moreover, I’m honestly tired of seeing them since it appears on all stages.
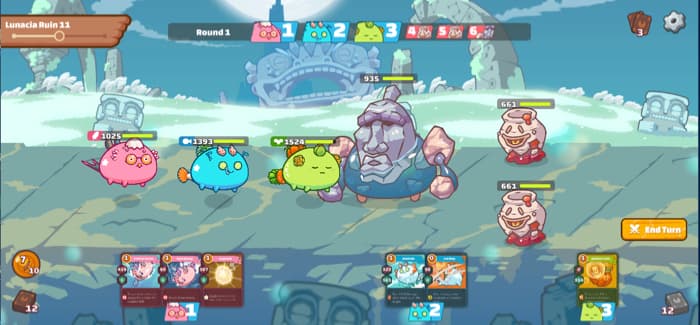
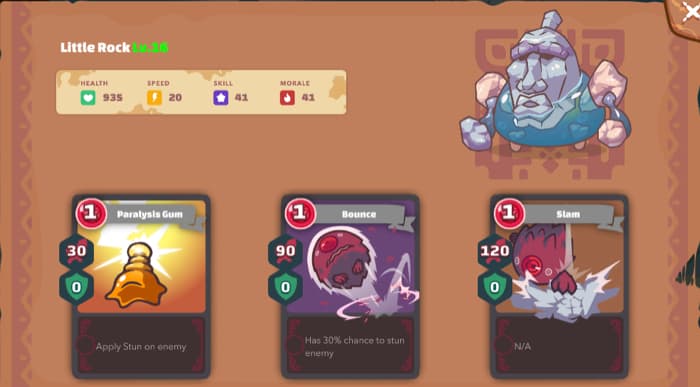
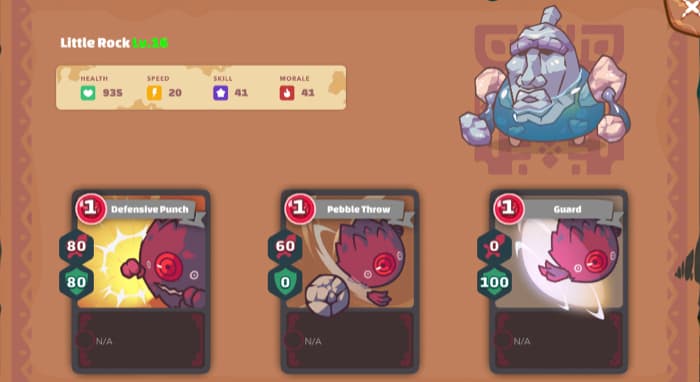
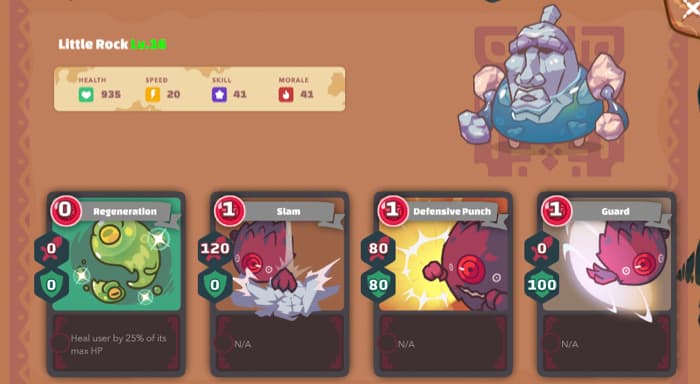
In Ruin2, that Little Rock appears.
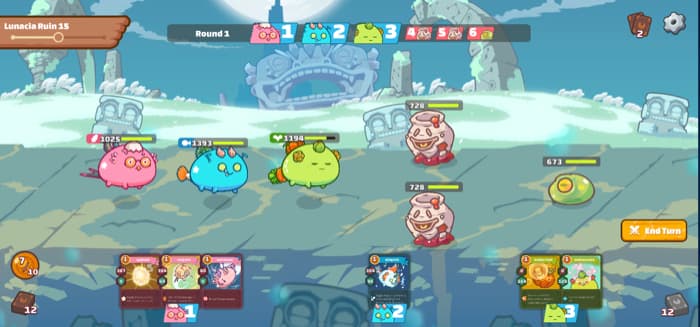
Your opponent will use a lot of cards in the first round, so try to use as many cards as you can to improve your defense .
[chat face=”TJ_normal.png” name=”TJ” align=”left” border=”gray” bg=”none” style=”maru”]For that reason, save energy with Ruin1 as much as possible.[/chat]
If you can defeat Ruin2’s Little Rock in the first round, your chances of clearing this stage will increase dramatically.
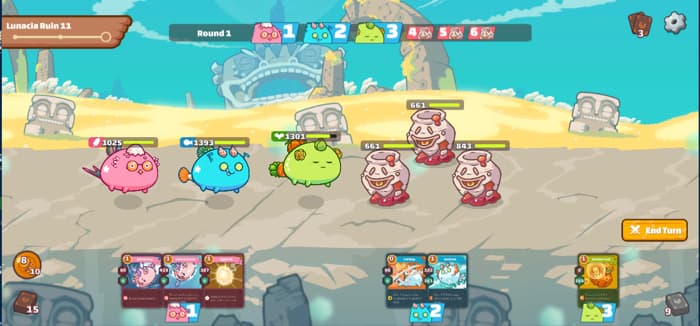
Red Jam, which appears in the front line of Ruin3, has defensive power and recovery cards.
So, you should use additional cards to defeat him.
Also, you need to be careful the enemy using a stun debuff, as damage will penetrate your shield.
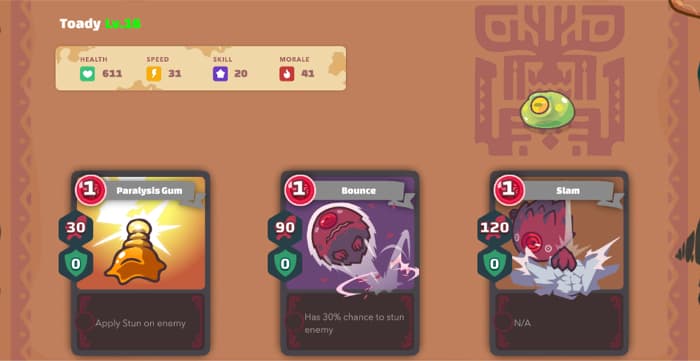
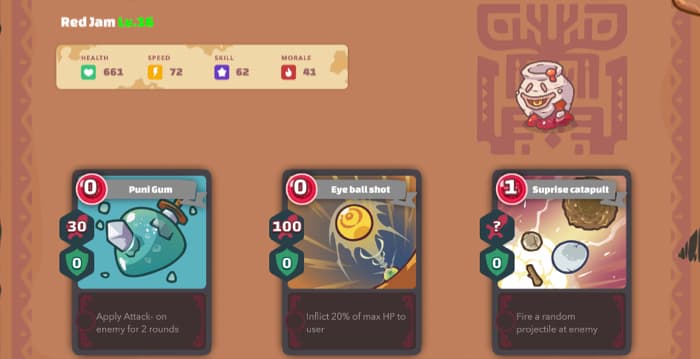
Enemy information
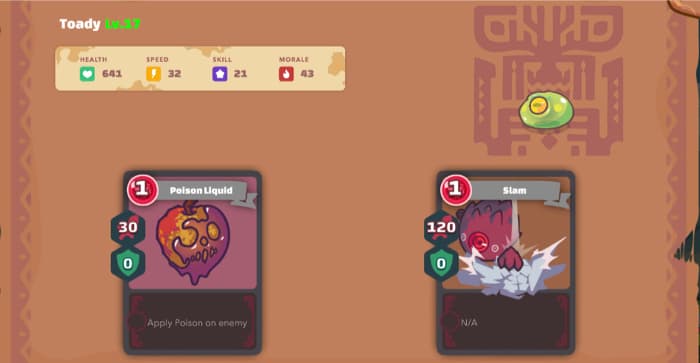
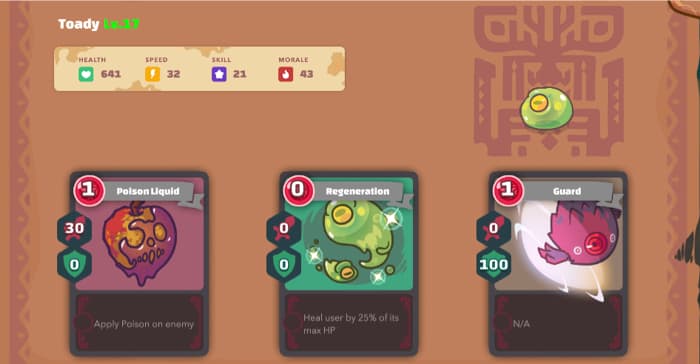
| Enemy 1: Toady |
 |
| Card 1 effect |
| Apply Stun Debuff to target (* Stun = Axie with this debuff will always fail the next attack. Attack, disappear when attacked. Attacked through the shield. ) |
| Card 2 effect |
| Apply a stun debuff to the target with a 30% chance. (* Stun = Axie with this debuff will always fail the next attack. Disappear when attack or attacked and damage will break through the shield. ) |
| Card 3 effect |
| nothing special |
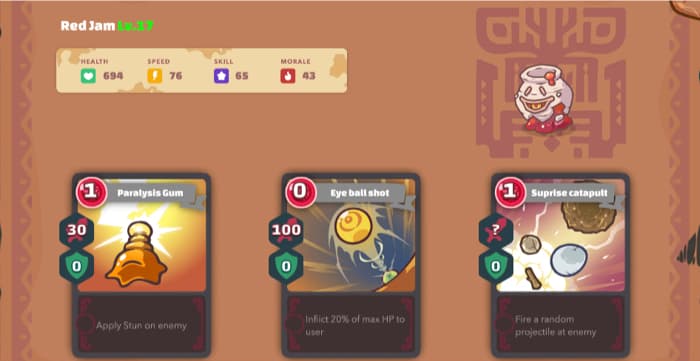
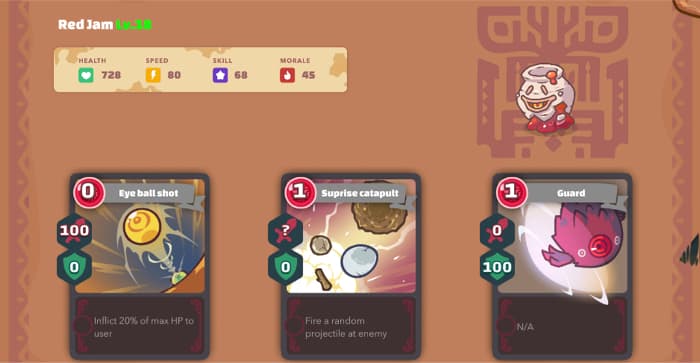
| Enemy 2: Red Jam |
 |
| Card 1 effect |
| Apply Attack- Debuff to target for 2 rounds (Speed- = 20% Attack decrease in the next round) |
| Card 2 effect |
| The user takes 20% of his maximum HP when used |
| Card 3 effect |
| Gives the opponent a random attack. |
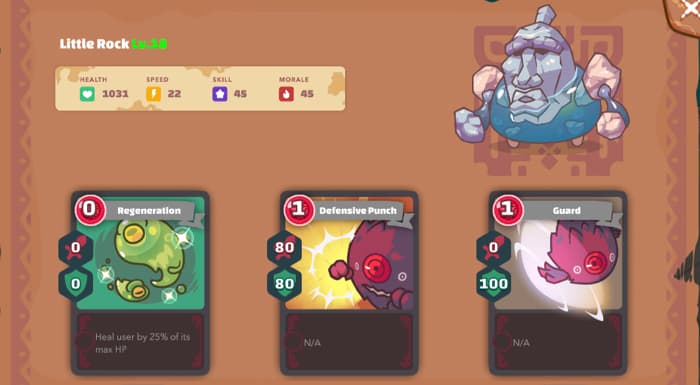
| Enemy 3: Little Rock |
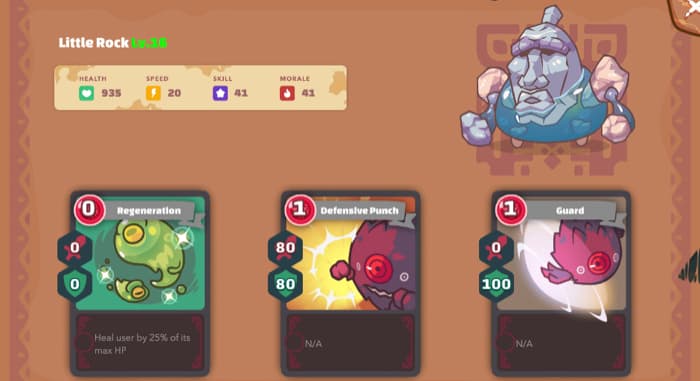 |
| Card 1 effect |
| Heal 25% of user’s maximum HP |
| Card 2 effect |
| nothing special |
| Card 3 effect |
| nothing special |
| Enemy 4: Red Jam |
 |
| Card 1 effect |
| Apply Stun Debuff to target (* Stun = Axie with this debuff will always fail the next attack. Attack, disappear when attacked. Attacked through the shield. ) |
| Card 2 effect |
| nothing special |
| Card 3 effect |
| The user takes 20% of his maximum HP when used |
| Enemy 5: Red Jam |
 |
| Card 1 effect |
| Heal 25% of user’s maximum HP |
| Card 2 effect |
| The user takes 20% of his maximum HP when used |
| Card 3 effect |
| nothing special |
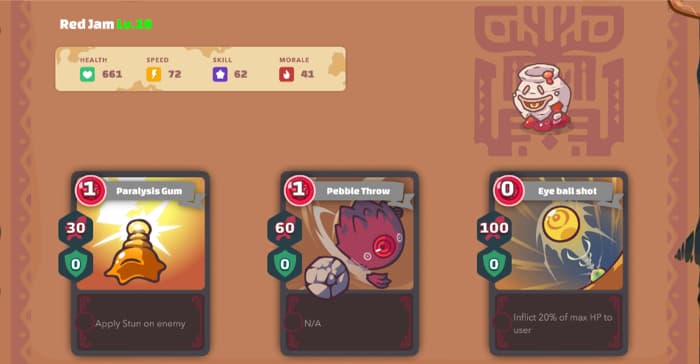
| Enemy 6: Red Jam |
 |
| Card 1 effect |
| Apply Stun Debuff to target (* Stun = Axie with this debuff will always fail the next attack. Attack, disappear when attacked. Attacked through the shield. ) |
| Card 2 effect |
| The user takes 20% of his maximum HP when used |
| Card 3 effect |
| Gives random damage to the opponent |
Experience earned / SLP
| Ruin | Aim level | Experience point | SLP |
| 11 | 10 | 440 | 4SLP |
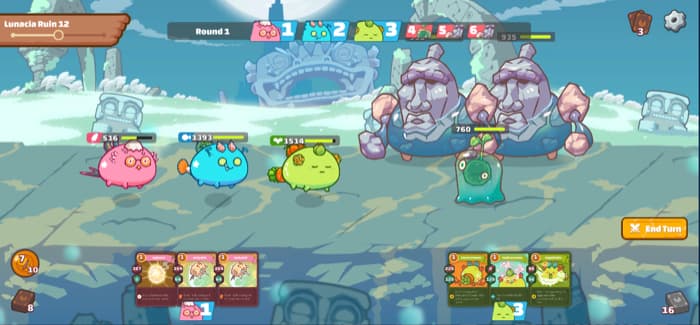
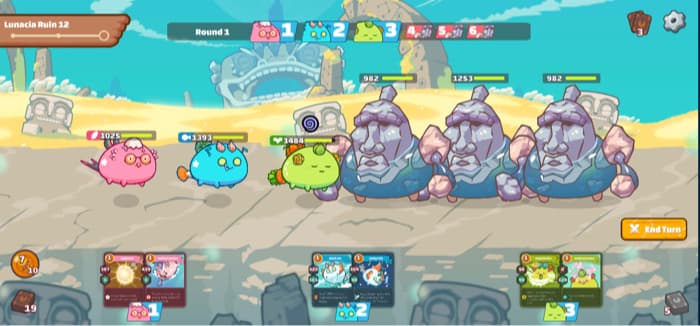
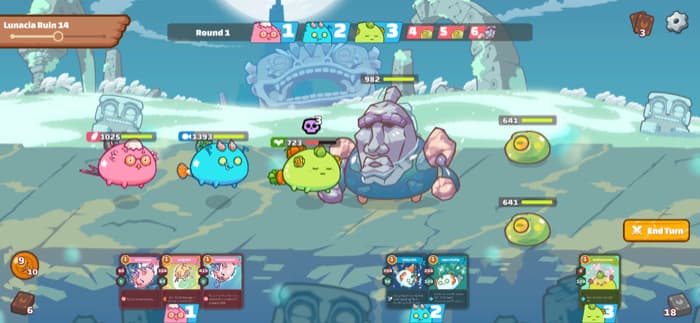
Ruin 12 (aim level 13)
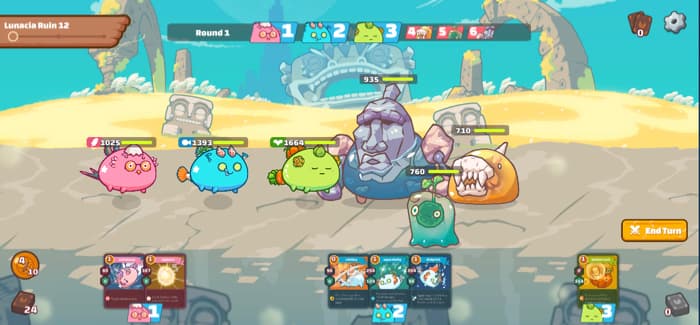


[chat face=”TJ_sad.png” name=”TJ” align=”left” border=”gray” bg=”none” style=”maru”]Finally, Ruin 12 from Hell.[/chat]
It is no exaggeration to say that it is the biggest wall in the first half of ADVENTURE.
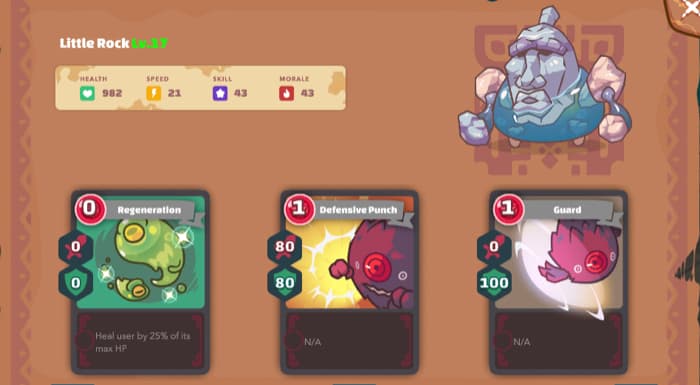
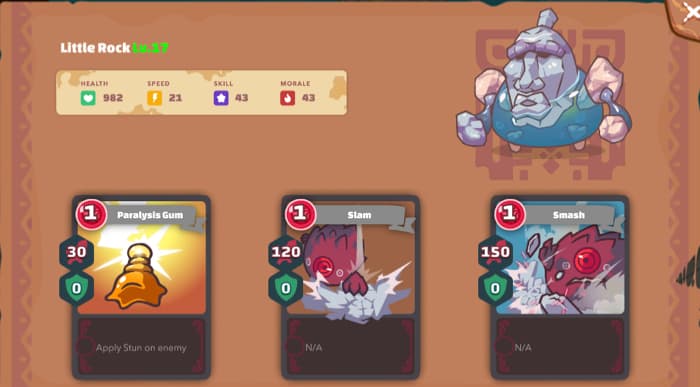
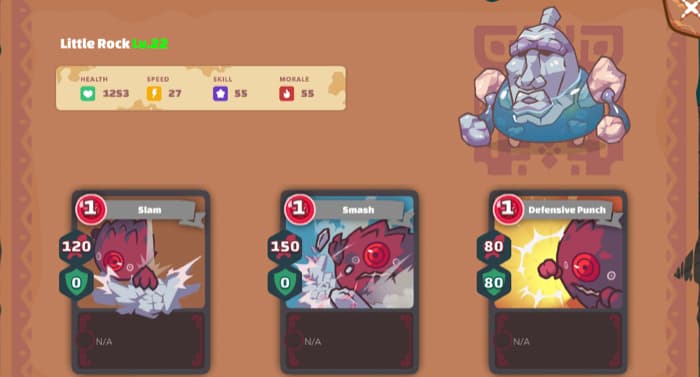
Because 6 out of 9 enemies are Little Rock , it’s really a wall (lol).
The screen will be narrow, so I hope Little Rock don’t come out.
[chat face=”TJ_sad.png” name=”TJ” align=”left” border=”gray” bg=”none” style=”maru”]The procedure and conditions when I cleared Ruin 12 are as follows.[/chat]
◯ Axie Arrangement
- Place Axie with high defense power in the front and Axie with high attack power in the back.
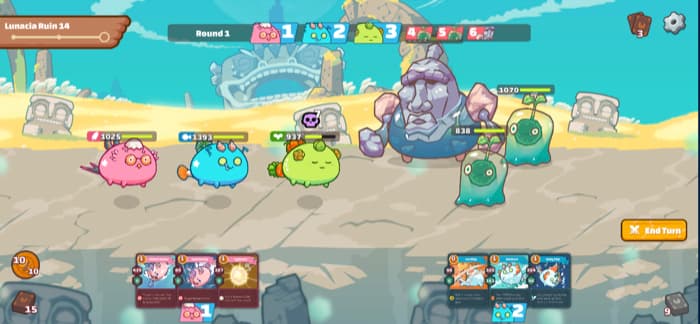
◯ Ruin 1
- Use defensive cards of front Axie in the first round (if you don’t get a good card, surrender and start again)
- Launch a mass attack in the second round and defeat Little Rock
- It’s preferable to remain Axie’s HP quite much at the time of clearing.
◯ Ruin 2
- Like Ruin1, you have to use front Axie as a shield in first round. And attack in the second round.
- Keep the HP of mid-line Axie as much as possible.
◯ Ruin 3
- In the first round, mid-line Axie takes opponent’s attack, and launch an all-out attack in subsequent rounds.
[chat face=”TJ_confuse.png” name=”TJ” align=”left” border=”gray” bg=”none” style=”maru”]It’s easy to write in words, but it’s quite difficult to actual try. ..[/chat]
If you can clear this stage, Ruin 13-14 can proceed relatively quickly.
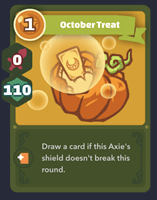
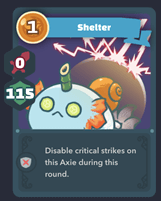
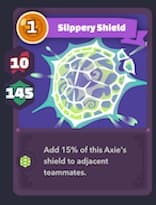
Cards with high defense are the followings.
HELMET(Shelter)
TIMBER(Woodman Power)

PUMPKIN(October Treat)

RED EAR(Slippy Shield)
Enemy information
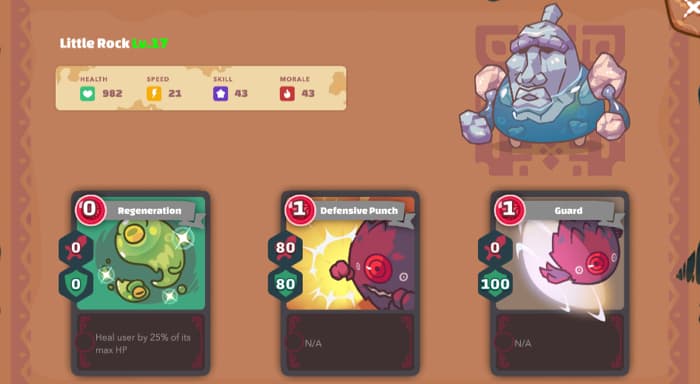
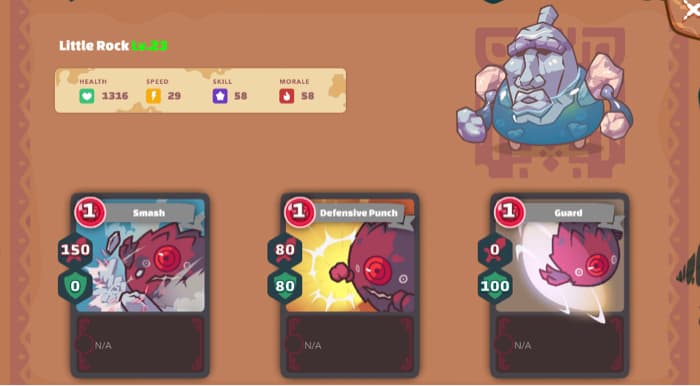
| Enemy 1: Little Rock |
 |
| Card 1 effect |
| nothing special |
| Card 2 effect |
| nothing special |
| Card 3 effect |
| nothing special |
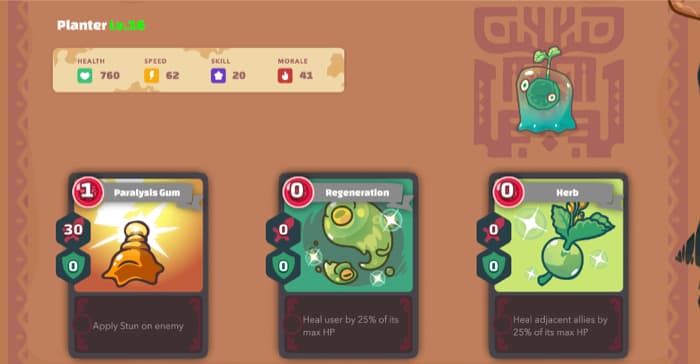
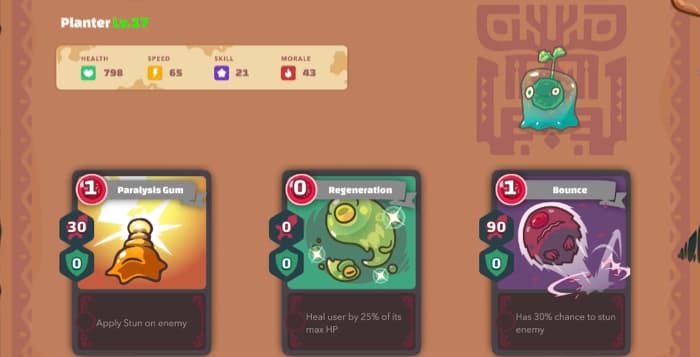
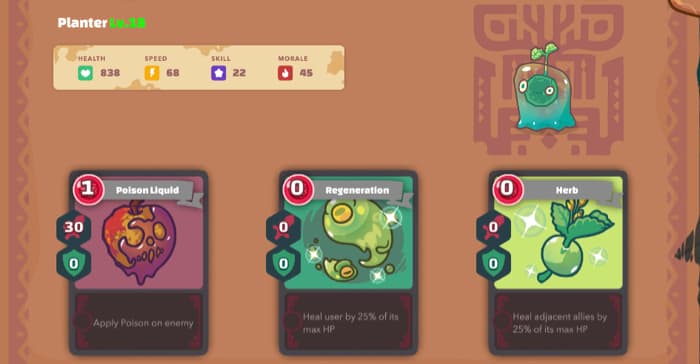
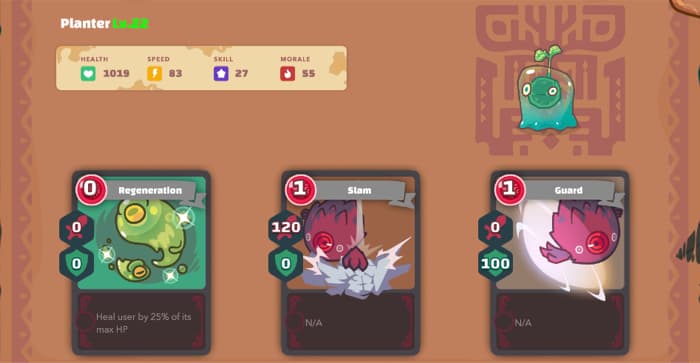
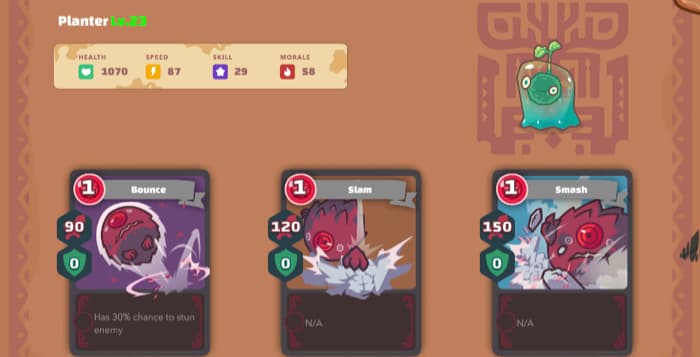
| Enemy 2: Planter |
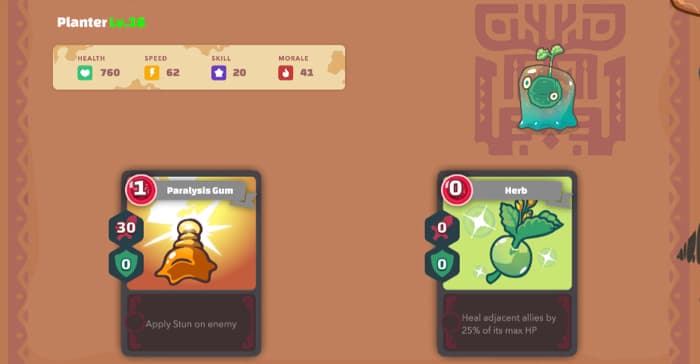 |
| Card 1 effect |
| Apply Stun Debuff to target (* Stun = Axie with this debuff will always fail the next attack. Attack, disappear when attacked. Attacked through the shield. ) |
| Card 2 effect |
| Heal adjacent allies by 25% of it’s maximum HP |
Card 3 effect
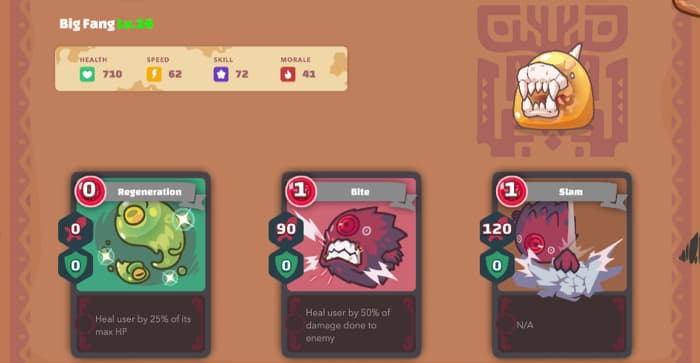
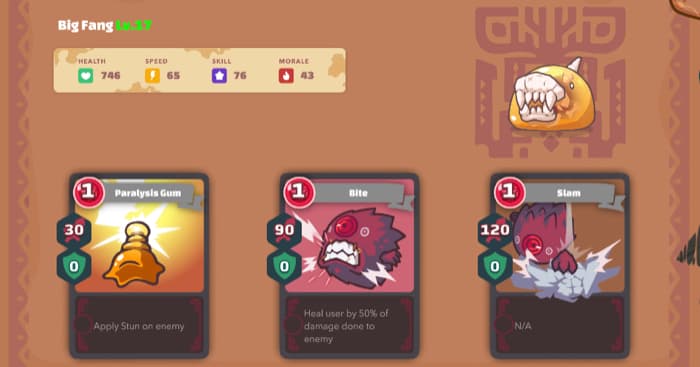
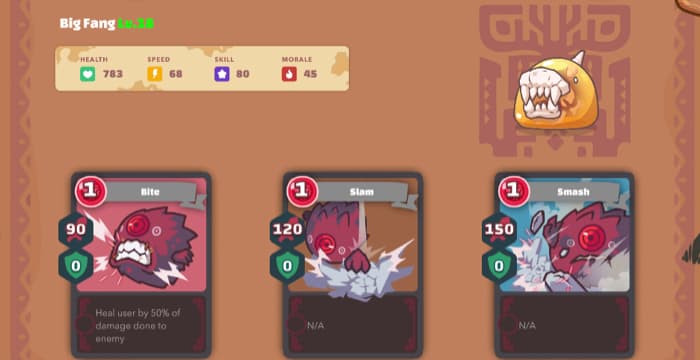
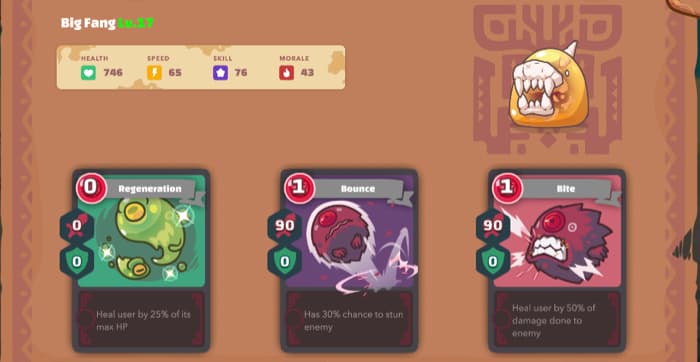
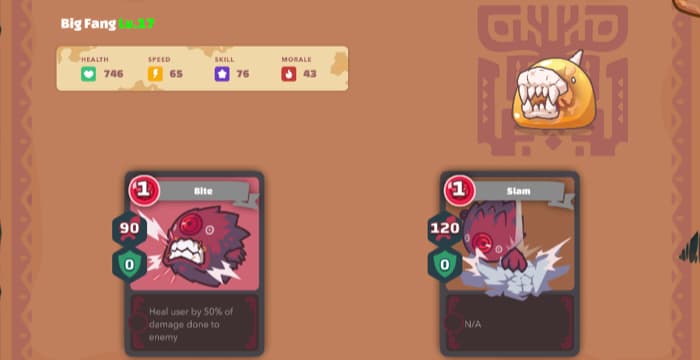
| Enemy 3: Big Fang |
 |
| Card 1 effect |
| Heals 25% of user’s maximum HP |
| Card 2 effect |
| Heal user by 50% of the damage to the target |
| Card 3 effect |
| nothing special |
| Enemy 4: Little Rock |
 |
| Card 1 effect |
| Heals 25% of user’s maximum HP |
| Card 2 effect |
| nothing special |
| Card 3 effect |
| nothing special |
| Card 4 effect |
| nothing special |
| Enemy 5: Planter |
 |
| Card 1 effect |
| Apply Stun Debuff to target (* Stun = Axie with this debuff will always fail the next attack. Attack, disappear when attacked. Attacked through the shield. ) |
| Card 2 effect |
| Heals 25% of user’s maximum HP |
| Card 3 effect |
| Heal adjacent allies by 25% of it’s maximum HP |
| Enemy 6: Little Rock |
 |
| Card 1 effect |
| Apply Stun Debuff to target (* Stun = Axie with this debuff will always fail the next attack. Attack, disappear when attacked. Attacked through the shield. ) |
| Card 2 effect |
| Apply a stun debuff to the target with a 30% chance (* Stun = Axie with this debuff will always fail the next attack. Disappear when attack or attacked and damage will break through the shield. ) |
| Card 3 effect |
| nothing special |
| Enemy 7: Little Rock |
 |
| Card 1 effect |
| Heals 25% of user’s maximum HP |
| Card 2 effect |
| nothing special |
| Card 3 effect |
| nothing special |
| Enemy 8: Little Rock |
 |
| Card 1 effect |
| nothing special |
| Card 2 effect |
| nothing special |
| Card 3 effect |
| nothing special |
| Enemy 9: Little Rock |
 |
| Card 1 effect |
| Apply Stun Debuff to target (* Stun = Axie with this debuff will always fail the next attack. Attack, disappear when attacked. Attacked through the shield. ) |
| Card 2 effect |
| nothing special |
| Card 3 effect |
| nothing special |
Experience earned / SLP
| Ruin | Aim level | Experience points | SLP |
| 12 | 13 | 548 | 4SLP |
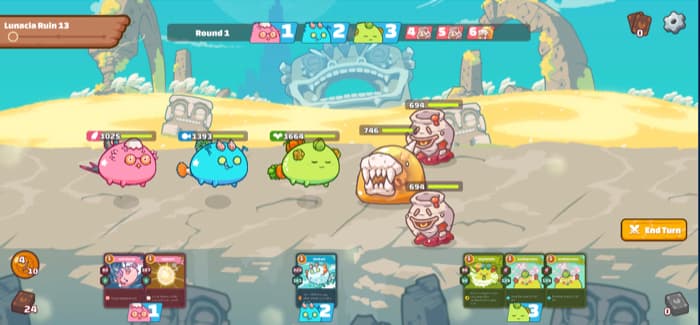
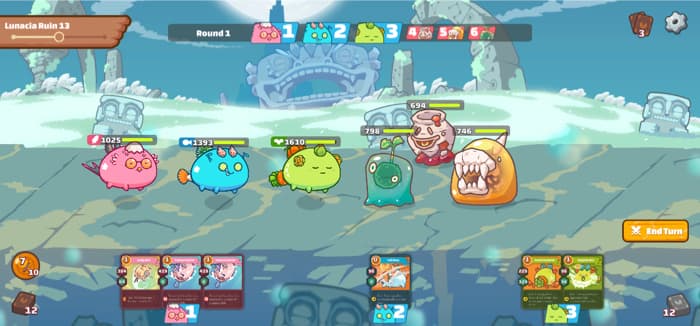
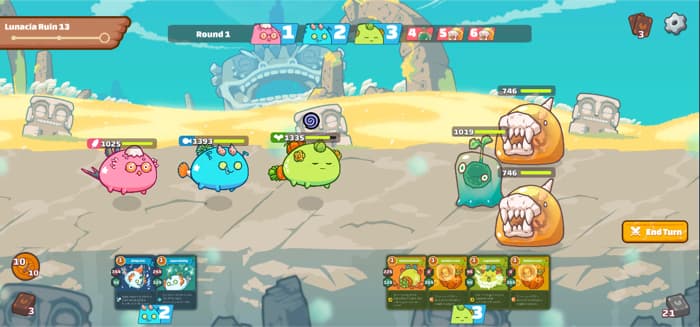
Ruin 13 (aim level 13)


You can feel relax by playing this stage because Little Rock will not appear in this Ruin.
[chat face=”TJ_confuse.png” name=”TJ” align=”left” border=”gray” bg=”none” style=”maru”]I don’t need Little Rock anymore, and want to ask him to leave.[/chat]
Ruin13 is easier than Ruin12, but enemies use cards with stun effects, so be careful of shield penetration .
Enemy information
| Enemy 1: Big Fang |
 |
| Card 1 effect |
| Heal 25% of user’s maximum HP |
| Card 2 effect |
| Apply a stun debuff to the target with a 30% chance (* Stun = Axie with this debuff will always fail the next attack. Disappear when attack or attacked and damage will break through the shield. ) |
| Card 3 effect |
| Heal user by 50% of the damage to the target |
| Enemy 2: Red Jam |
 |
| Card 1 effect |
| Apply Stun Debuff to target (* Stun = Axie with this debuff will always fail the next attack. Attack, disappear when attacked. Attacked through the shield. ) |
| Card 2 effect |
| The user takes 20% of his maximum HP when used |
| Card 3 effect |
| Gives random damage to the opponent |
| Enemy 3: Planter |
 |
| Card 1 effect |
| Apply Stun Debuff to target (* Stun = Axie with this debuff will always fail the next attack. Attack, disappear when attacked. Attacked through the shield. ) |
| Card 2 effect |
| Heals 25% of user’s maximum HP |
| Card 3 effect |
| Apply a stun debuff to the target with a 30% chance (* Stun = Axie with this debuff will always fail the next attack. Disappear when attack or attacked and damage will break through the shield. ) |
| Enemy 4: Big Fang |
 |
| Card 1 effect |
| Apply Stun Debuff to target (* Stun = Axie with this debuff will always fail the next attack. Attack, disappear when attacked. Attacked through the shield. ) |
| Card 2 effect |
| The user takes 20% of his maximum HP when used |
| Card 3 effect |
| Gives random damage to the opponent |
| Enemy 5: Big Fang |
 |
| Card 1 effect |
| Heal user by 50% of the damage to the target |
| Card 2 effect |
| nothing special |
| Enemy 6: Planter |
 |
| Card 1 effect |
| Heal 25% of user’s maximum HP |
| Card 2 effect |
| nothing special |
| Card 3 effect |
| nothing special |
| Enemy 7: Big Fang |
 |
| Card 1 effect |
| Apply Stun Debuff to target (* Stun = Axie with this debuff will always fail the next attack. Attack, disappear when attacked. Attacked through the shield. ) |
| Card 2 effect |
| Heal user by 50% of the damage to the target |
| Card 3 effect |
| nothing special |
Experience earned / SLP
| Ruin | Aim level | Experience points | SLP |
| 13 | 13 | 484 | 4-7 SLP |
Ruin 14 (aim level 13)


In this Ruin, the enemy uses Poison, so you should avoid long-term battles.
Poison takes 2 damage per poison debuff for every turn.
At first, it seems that the damage is not great, but this will be effective later.
[chat face=”TJ_normal.png” name=”TJ” align=”left” border=”gray” bg=”none” style=”maru”]So, if you can defeat the enemy, let’s attack even if the combination of cards is a little bad .[/chat]
This action is to avoid being attacked by Poison as much as possible.
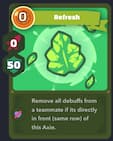
You’ll need the following cards to unlock the Poison Debuff, but you won’t need to buy a new Axie to clear this Ruin.
BIDENS(Cleanse Scent)

MINT(Refresh)

PIGEON POST(Blackmail)

Wave3’s Little Rock has high defense cards, and it’s annoying as the middle-line Planter recovers Little Rock.
In addition, the Planter in the back-line has high HP and attack power, so I often wins at the last stand.
[chat face=”TJ_confuse.png” name=”TJ” align=”left” border=”gray” bg=”none” style=”maru”]If you’re not careful because you defeated Little Rock, you’ll be surprised … (actual experience)[/chat]
Enemy information
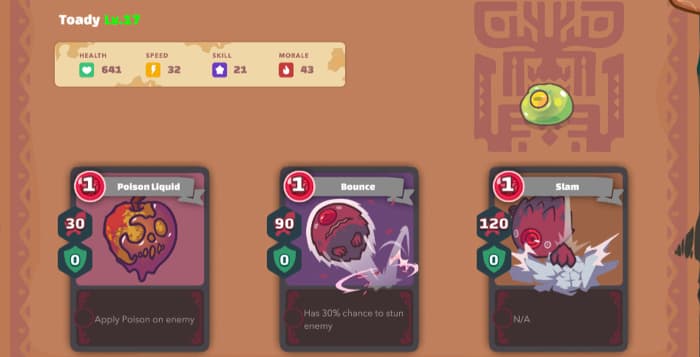
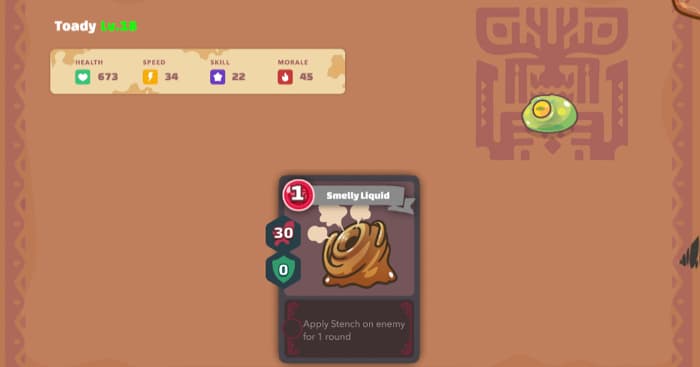
| Enemy 1: Toady |
 |
| Card 1 effect |
| Apply Poison Debuff to target (Poison = 2 damage per poison debuff every time someone moves) |
| Card 2 effect |
| Heals 25% of user’s maximum HP |
| Card 3 effect |
| nothing special |
| Enemy 2: Toady |
 |
| Card 1 effect |
| Apply Poison Debuff to target (Poison = 2 damage per poison debuff every time someone moves) |
| Card 2 effect |
| Apply a stun debuff to the target with a 30% chance (* Stun = Axie with this debuff will always fail the next attack. Disappear when attack or attacked and damage will break through the shield. ) |
| Card 3 effect |
| nothing special |
| Enemy 3: Little Rock |
 |
| Card 1 effect |
| Heals 25% of user’s maximum HP |
| Card 2 effect |
| nothing special |
| Card 3 effect |
| nothing special |
| Enemy 4: Toady |
 |
| Card 1 effect |
| Apply Poison Debuff to target (Poison = 2 damage per poison debuff every time someone moves) |
| Card 2 effect |
| nothing special |
| Enemy 5: Little Rock |
 |
| Card 1 effect |
| Heals 25% of user’s maximum HP |
| Card 2 effect |
| nothing special |
| Card 3 effect |
| nothing special |
| Enemy 6: Planter |
 |
| Card 1 effect |
| Apply Poison Debuff to target (Poison = 2 damage per poison debuff every time someone moves) |
| Card 2 effect |
| Heals 25% of user’s maximum HP |
| Card 3 effect |
| Heal adjacent allies by 25% of it’s maximum HP |
| Enemy 7: Planter |
 |
| Card 1 effect |
| Apply a stun debuff to the target with a 30% chance (* Stun = Axie with this debuff will always fail the next attack. Disappear when attack or attacked and damage will break through the shield. ) |
| Card 2 effect |
| nothing special |
| Card 3 effect |
| nothing special |
Experience earned / SLP
| Ruin | Aim level | Experience points | SLP |
| 14 | 13 | 443 | 4-7 SLP |
Ruin15 (aim level 14)
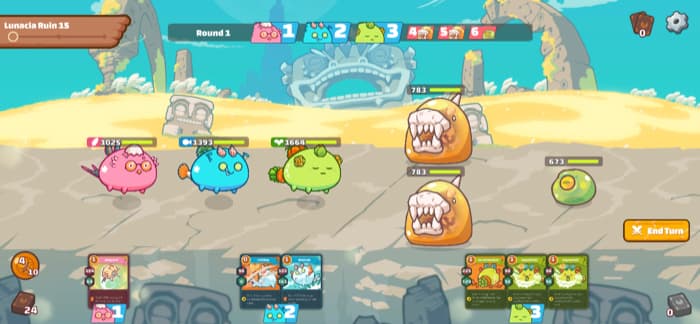

This is the last Ruin explained in this article.
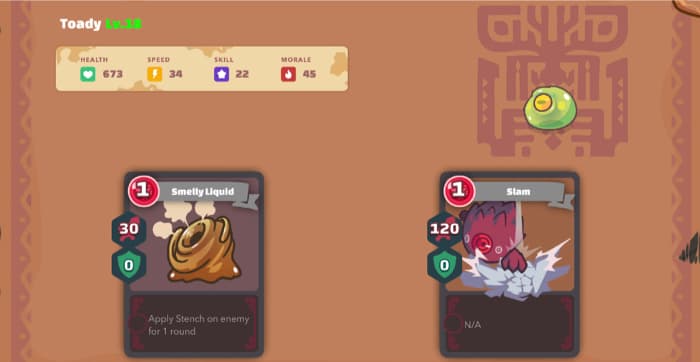
In Ruin15, some enemies will use cards with new “Stench” debuffs.
Stench debuffs have the effect of not being attacked (if everyone is in the Stench debuff state, the front Axie will be attacked).
[chat face=”TJ_normal.png” name=”TJ” align=”left” border=”gray” bg=”none” style=”maru”]You might think lucky if the card’s attack power is low and you can’t attack it, but it’s dangerous.[/chat]
For example, even if the front Axie uses a highly defensive card to be attacked, the next opponent’s attack will go to the back Axie.
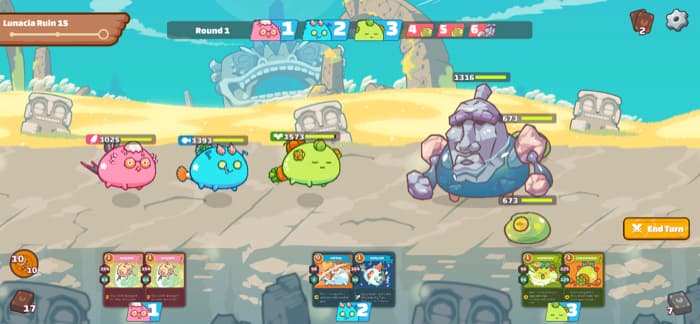
You don’t have to be aware of Wave1 and Wave2 because the slowest enemy will use them, but Wave3 should be careful .
[chat face=”TJ_sad.png” name=”TJ” align=”left” border=”gray” bg=”none” style=”maru”]Toady adds a Stench debuff, and Little Rock gives a huge damage to the back-line Axie.[/chat]
Therefore, it is also an effective strategy to use the card for Axie in the back and improve the defense power as much as possible.
Enemy information
| Enemy 1: Big Fang |
 |
| Card 1 effect |
| Heal user by 50% of the damage to the target |
| Card 2 effect |
| nothing special |
| Card 3 effect |
| nothing special |
| Enemy 2: Toady |
 |
| Card 1 effect |
| Apply a Stench debuff to the attack target for one round. (Stench = Axie with this debuff is not to be a target) |
| Enemy 3: Red Jam |
 |
| Card 1 effect |
| The user takes 20% of his maximum HP when used |
| Card 2 effect |
| Gives random damage to the opponent |
| Card 3 effect |
| nothing special |
| Enemy 4: Little Rock |
 |
| Card 1 effect |
| nothing special |
| Card 2 effect |
| nothing special |
| Card 3 effect |
| nothing special |
| Enemy 5: Toady |
 |
| Card 1 effect |
| Apply a Stench debuff to the attack target for one round. (Stench = Axie with this debuff is not to be a target) |
| Card 2 effect |
| nothing special |
Experience earned / SLP
| Ruin | Aim level | Experience points | SLP |
| 15 | 14 | 457 | 6-12 SLP |
Summary
In this article, I introduced the strategy information of Ruin 11 ~ 15.
[chat face=”TJ_confuse.png” name=”TJ” align=”left” border=”gray” bg=”none” style=”maru”]Ruin12 is pretty tough.[/chat]
The SLP and experience points earned when clearing Ruin 11 to 15 are as follows.
| Ruin | Aim level | Experience points | SLP |
| 11 | 10 | 440 | 4SLP |
| 12 | 13 | 548 | |
| 13 | 13 | 484 | 4-7 SLP |
| 14 | 13 | 443 | |
| 15 | 14 | 457 | 6-12 SLP |
・The maximum SLP that can be obtained by clearing ADVENTURE is 50 SLP per day.
・Experience points are not available without consuming Energy (20 by default).
・The amount of experience you can earn depends on the level of your Axie.
[chat face=”TJ_normal.png” name=”TJ” align=”left” border=”gray” bg=”none” style=”maru”]We are planning to create information after Ruin16, so stay tuned![/chat]